Choosing the Right Integration Path
Integrating Paybis On/Off Ramp consists of two key parts:
- Backend setup — handles things like generating secure signatures, creating session data (requestId) or URL signing
- Frontend initialization — is responsible for opening the widget using the Web SDK, a direct URL, or native mobile SDKs.
Paybis offers flexible integration paths tailored to your app’s architecture and user flow — whether you're building a decentralized app, a lightweight frontend-only app, or a full-featured platform.
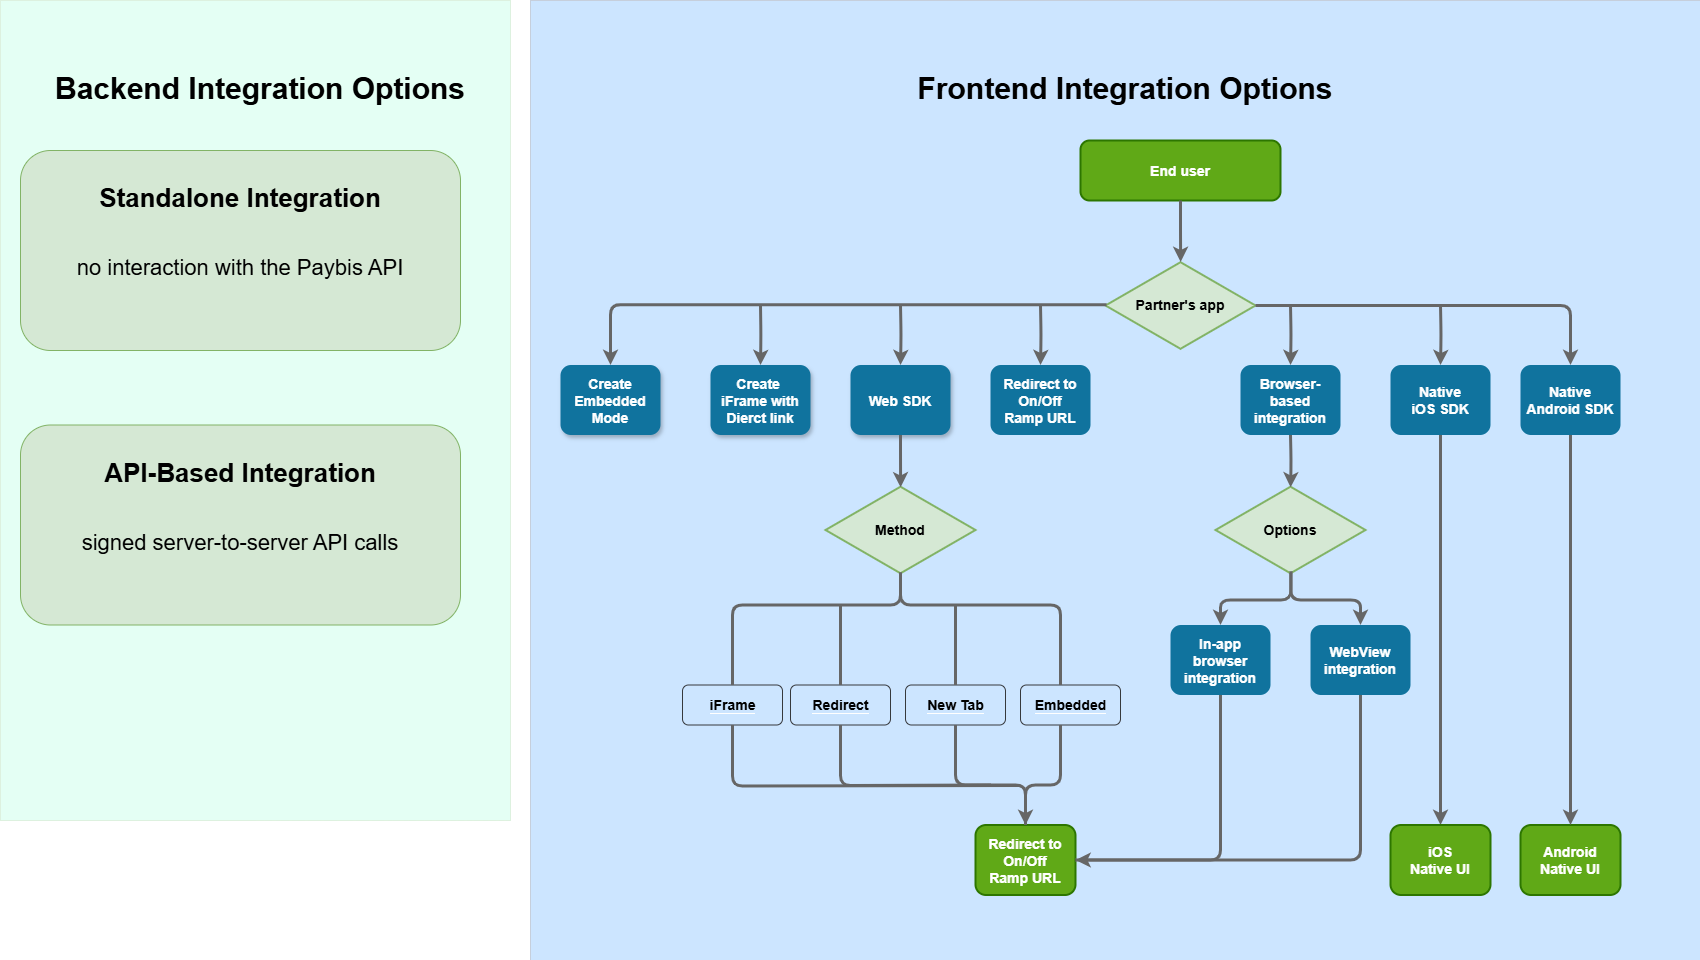
Backend integration options
Choose from two integration models, depending on your setup:
Standalone Integration
Fast and simple: this method lets you launch the Paybis widget using a signed URL with custom query parameters or our Web SDK.
It requires no interaction with the Paybis API — ideal for lightweight or frontend-centric apps.
Backend is only needed to generate a secure HMAC signature for the widget URL.
See Generating HMAC Signatures for more details.
⚠️Note: since you're not using the API, some advanced features (like pre-quote customization, shared KYC, or Single sign-on) are not available.
API-Based Integration
This integration method uses direct server-to-server communication with the Paybis API, authenticated via your private API key. For additional security, the request body must be signed on your backend, ensuring the integrity and authenticity of all transmitted data.
It gives you full control over the user flow and enables advanced features such as: Shared KYC, Single Sign-On (SSO), One-click checkout and Frictionless Off-Ramping for Wallets
As part of this flow, you’ll create a session ID (requestId) via API. This ID encapsulates all passed parameters (amount, currency, user info, etc.) and is used to initialize the widget on the frontend.
While the implementation is more involved, this is the most powerful and scalable way to integrate Paybis.
Key functionality offered by Paybis API
- get a Quote for the supplied amount and fiat/cryptocurrency pair for all or specific payment/payout method
- get the list of supported fiat/cryptocurrency pairs enabled for your partner account
- get the list of supported payment and payout methods with transaction amount limits
- pass the extra transaction and customer data in the session Request used to initialize the widget front to customize the user journey
- pass the extra customer data to apply add-ons: KYC reliance (Shared KYC), Single Sign-On, One-click checkout
Backend integration options comparison
Integration type | Integration process | Supported add-ons and flows | Compatible frontend options |
|---|---|---|---|
Standalone Integration |
|
|
|
|
|
|
|
Frontend integration options
Web SDK
This option is suitable for web applications and provides seamless functionality within the browser environment.
It's platform-independent, easy to deploy, and straightforward. All new feature enhancements for the On/Off Ramp are seamlessly deployed to the SDK without requiring any modifications in the integration on your end.
Frontend Initialization Modes
| Mode | Description | How to use |
|---|---|---|
| iFrame fullscreen overlay | Opens the widget in a full-screen iframe overlay using the JavaScript SDK. Apple Pay is not supported in this mode. | Use PartnerExchangeWidget.open() or openInIframe(). You can also build your own iframe manually. |
| Redirect | Redirects the user to the widget in the same browser tab. | Use openRedirect() from SDK or perform native redirect to a signed direct URL. |
| New browser tab | Opens the widget in a new browser tab. | Use openInNewTab() from SDK or open a signed direct URL in a new tab manually. |
| Embedded mode | Integrates the widget directly into your layout (inside a DOM element), allowing seamless, customizable in-page experiences. | Use openInEmbed() and provide a target DOM element. |
Native mobile SDKs
Native iOS SDK
Tailored for iOS applications, the Native iOS SDK provides a robust and native integration for a smooth user experience on Apple devices and access to iOS-specific features. Note that upgrading to the latest SDK version is necessary whenever new functionality is released by Paybis.
Native Android SDK
Designed for Android applications, ensures optimal performance and seamless user experience on Android devices. Note that upgrading to the latest SDK version is necessary whenever new functionality is released by Paybis.